Selling and automation
The Selling menu is where you connect your billing system to the panel, let an AI app work on your hosting, and see which of your customers use Cloudflare. This page covers API access, AI access, AI assistant and Cloudflare. Plans and your own name for customers are under Selling › Packages and Selling › Branding.
A sale, step by step
Once the billing system is connected, a sale needs no work from you:
- You make a plan under Selling › Packages.
- In your billing system you make a product, pick the panel as its module and choose that plan.
- A customer orders and pays.
- The billing system asks the panel to make the account. It appears under Customers › Accounts on your plan, within your limits.
- The customer gets the welcome email from the billing system, with their panel address and login.
- Late payment: the billing system suspends the account and unsuspends it when the invoice is paid. A plan change in the billing system changes the plan here.
Steps 2 to 4 need an API token and a billing module. Both are below.
API access
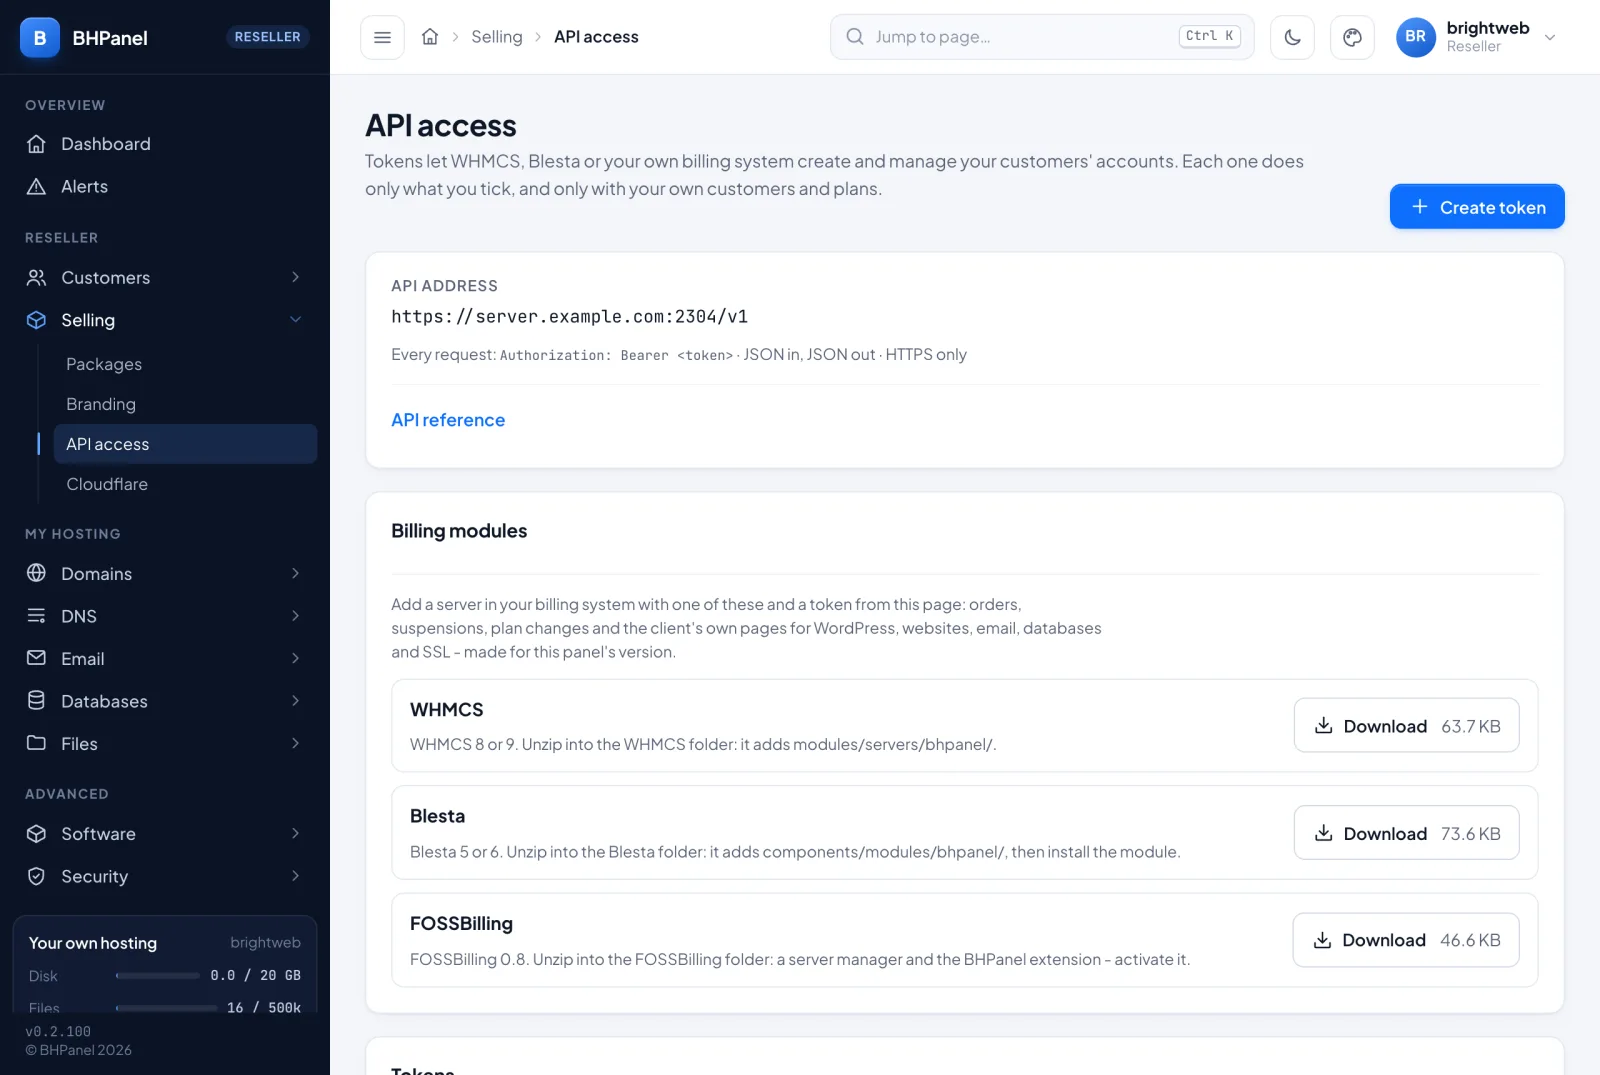
Open Selling › API access. A token lets WHMCS, Blesta, FOSSBilling or your own script create and manage your customers' accounts. A token is not a password to the server. It does only what you tick, and only with your own customers and plans.
The page shows the API address (port 2304) and an API reference you can open for the list of requests.
Make a token
-
Press Create token.
-
Type a Name, for example
WHMCS - billing.example.com. It helps you tell tokens apart in the list and the audit log. -
Under What it can do, tick the switches:
Switch What it allows Read Accounts, plans, disk and transfer use. Needed for the connection check. Create accounts New accounts on your plans, within your limits Suspend and unsuspend Overdue invoices and paying them Change plan Upgrades and downgrades Change password The customer's panel login Sign-in link "Log in to control panel" opens your customers' panels, as your own Log in does Terminate accounts Cancellations. Off by default. The account is kept as a leftover (14 days by default), then removed. Sign in to the panel as you The billing system's server list opens your own panel. Off by default. Manage the account's contents Inside the billing system: WordPress, websites, email, databases and SSL. Off by default. The switches shown in red are off by default. Tick them only if you need them.
-
In Only from these addresses you can enter the addresses the token may be used from, one per line. Use IPv4, IPv6 or a range like
203.0.113.0/24. Empty means any address. If you tick Sign in to the panel as you, enter your billing server's public IP. -
Choose when it Expires: Never, In 30 days, In 90 days or In a year.
-
Press Create token.
The token is shown once. Copy it now. The panel keeps only a hash of it. If you lose it, revoke it and make another. Do not reload the page, or you make another token.
A reseller's token works only on your own customers and your own plans. Exporting accounts and connecting a DNS-only server are for the administrator's tokens only.
The list
Tokens lists each token with what it can do, the addresses it is limited to, when it expires (Expired in red once it has), and when and from where it was Last used. Every request a token makes is in the audit log under its name.
Revoke a token
Press Revoke on its row and confirm. It stops working at once. Whatever uses it gets "not valid" on the next request. Revoke a token when you stop using a billing system, when someone who knew it leaves, or when you think it leaked.
Connect your billing system
The panel has modules for WHMCS 8 and 9, Blesta 5 and 6, and FOSSBilling 0.8.
-
On Selling › API access, find Billing modules and press Download next to your billing system. Each zip is made for your panel's version and has a setup guide inside.
-
Unzip it in the billing system's own folder.
-
Add a server in the billing system:
WHMCS Blesta FOSSBilling Where System Settings › Servers › Add New Server Settings › Modules › Available › BHPanel › Install, then Add Server System › Hosting plans and servers › New server (Server manager: BHPanel) Hostname the panel's hostname the same the same Port 2304 (tick "Override with Custom Port") 2304 2304 Token in the Password field API token API token The hostname is shown on the page when your new token is displayed.
-
Make a product, pick the panel as its module and choose the plan it sells.
The module install detail, with each system's screens, is on the Selling hosting page.
One-click sign-in
With Sign-in link ticked, the billing system shows a "Log in to control panel" button on each service. It opens that customer's panel without a password. The link works once and only within 60 seconds. With Manage the account's contents ticked, the customer's service page in the billing system also gets tabs for WordPress, websites, email, databases and SSL.
AI access
Open Selling › AI access to connect your own AI app, such as Claude or Cursor, to your hosting. The server runs no AI and pays for none. Every request an AI makes goes through the same checks as a click in the panel.
If you see AI connections cannot be made right now, your hosting provider has switched AI access off, or it is not part of your plan. The page shows the reason. Ask your hosting provider.
Make a connection
- Press New AI connection.
- Type a Name, for example
Claude on my laptop. - Choose Stops working after: 30 days, 90 days, 1 year or Never.
- Under Which accounts, choose how far it reaches:
- Only my own hosting: your own account and its sites.
- Mine and all my customers: all your customers, now and any you add later.
- Customers I choose: pick them in the list that opens.
- Tick what it may do. Look around is always on. Under What it may do on those accounts you can add Websites and files, Email, Databases, DNS records and Site settings. Under Reseller tasks you can add Create customers and Suspend, unsuspend, change plan.
- Optional: in Only from these addresses enter the addresses it may connect from. An AI app that runs in the cloud, such as claude.ai, connects from its own servers, not from your computer.
- Press Create connection.
The address and the key are shown once, with setup steps for each popular AI app. Copy the key now. A lost key means revoking the connection and making a new one.
A connection limited to your own account or to some customers cannot list all your customers. Ask it about a named customer instead. It also cannot touch a customer you did not choose: such a request is answered as if the customer did not exist.
Never allowed
No AI can delete a customer, website, database or mailbox, change anyone's panel password or two-factor sign-in, sign in as a customer, run commands, or see passwords. This is fixed in the panel and you cannot switch it on.
Watch and undo
Your AI connections lists each one with the accounts it reaches (own + all customers, or own + N chosen), what it may do, when it was last used and when it stops. Press Revoke to stop one at once.
What your AI did lists every request, with filters All, Refused and Changes. Press Turn Undo on to be able to put back what the AI changes for 7 days. The panel keeps a copy of each file it changes. Then press Undo next to a change.
A connection is limited too: it can make a limited number of requests a minute and an hour, and answers "slow down" past that.
AI assistant
Selling › AI assistant is a chat inside the panel. You use your own AI key, so the server pays for nothing. It can do what an AI connection can do, for your own account and all your customers. It looks around freely and changes nothing until you press Apply.
- Press Key settings.
- Choose the Provider. For Other, enter the Provider address.
- Paste your API key and choose the Model.
- Optional: set a Monthly limit in million tokens. The assistant stops at the limit and says so.
- Under It may suggest changes to, tick what it may suggest. Look around is always on.
- Press Save, then New chat.
Your key is stored encrypted and is never shown again. Remove key deletes it. You can protect the assistant with a PIN or password: Lock now closes it until you enter it again.
If the page says the assistant is not available, it is not part of your plan. Ask your hosting provider.
Cloudflare
Selling › Cloudflare is an overview only. It lists your customers who connected their own Cloudflare account, with Connected, Domains on Cloudflare, Active and Problems (failing domains in red).
Each customer connects and manages Cloudflare on their own panel, under DNS › Cloudflare. You cannot connect for them, and tokens are never shown. If none of your customers use it, the page says so.