Software: PHP, apps and add-ons
The Software menu is where you decide what your customers can run: PHP versions, WordPress, Node.js, Python, containers and optional extras such as Softaculous. Customers choose from what you install here.
PHP
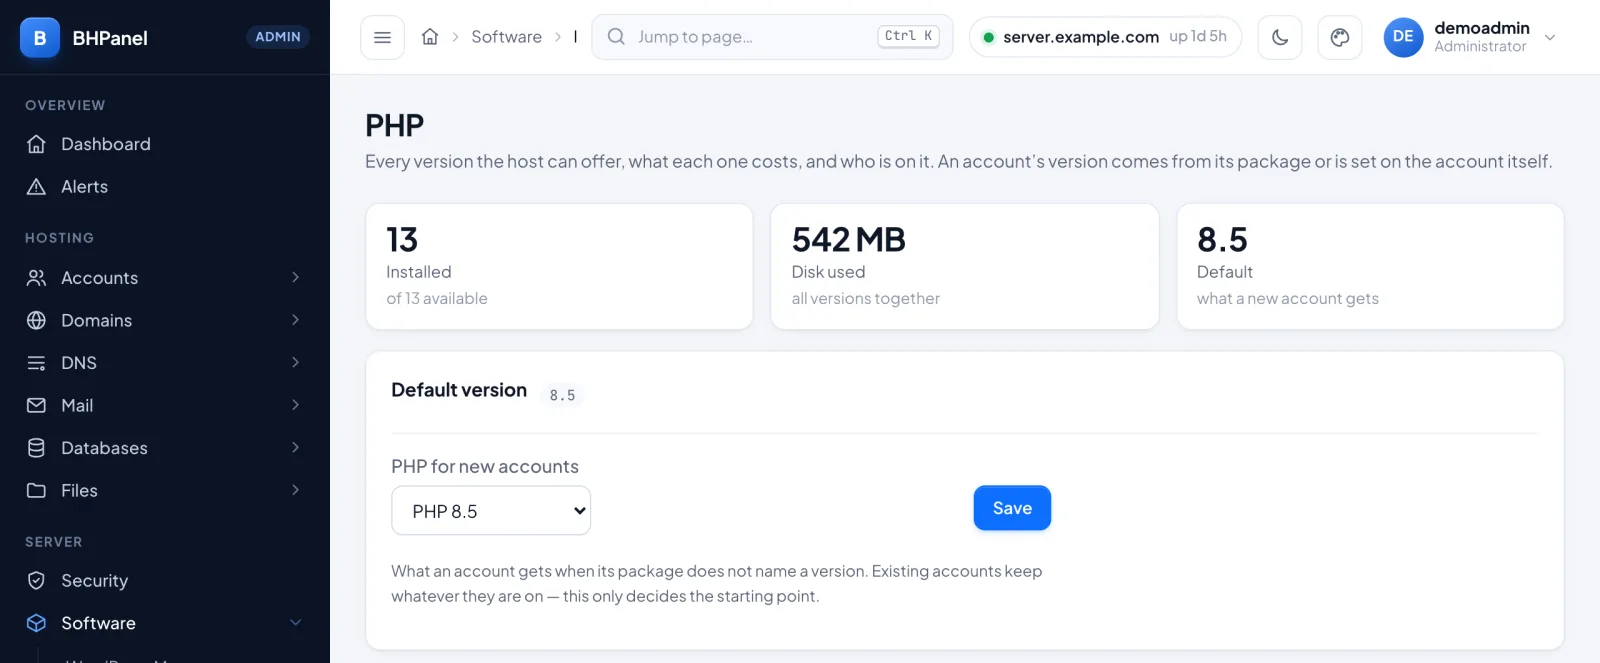
Open Software › PHP. The top of the page shows how many versions are installed, how much disk they use and the default version. Below that is one card per version.
Install and remove a version
- Find the version's card. It is marked not installed.
- Click Install. It runs in the background. Reload the page to follow it.
To install every missing version in one go, use Install everything that is missing. A full version is about 40 MB, so on a small server install only the ones a site needs.
PHP 5.6, 7.0, 7.1, 7.2 and 7.3 are past end of life. They carry an end of life badge and are installed one at a time, never by the "install everything" button. The first one lays down its own separate tree, so it takes longer. Some of these versions are not built for ARM servers. Their Install button is then greyed out and the card says why.
Remove only appears when no account uses the version and it is not the default. Otherwise the card says it is in use.
A card can also show these badges:
- BHPanel build or Remi: who built the package.
- security update available: a fixed build is out. Install it with Server › Update.
- security fix pending: no fixed build exists yet. The card names the settings that protect you meanwhile.
- N processes on the previous build: PHP workers still run the old package until their pools reload.
The default version
In Default version, pick a version under PHP for new accounts and click Save. Only installed versions are listed.
The default is only the starting point for an account whose package names no version. Existing accounts keep their version.
Extensions
Each installed version lists its extensions. An extension shown struck through is installed but not loaded, so sites cannot use it.
To add one, open Add an extension on the card and click the extension. This restarts the PHP of every account on that version.
Server-wide limits
Two folded sections at the bottom of the page apply to all customer accounts. The panel's own PHP, phpMyAdmin and webmail are left out on purpose.
- Disabled functions: PHP functions no site may call. Edit the comma-separated list and click Save. A site cannot undo this with
ini_set()or.user.ini. Put back the built-in list restores the default. - Server defaults: the value every account gets for each setting unless it has its own. Leave a field empty to use the built-in value shown in it. Click Save server defaults.
An account's own value wins over the server default. The table What an account may override lists each setting an account may change and its Limit, which is the ceiling. Isolation settings such as open_basedir and disable_functions are never in that table.
For account limits that are not PHP settings, see Plans and performance.
WordPress Manager
Software › WordPress Manager installs WordPress for a customer and lists what is already there.
- Under Account, choose an account and click Show.
- The Installed table lists that account's WordPress sites: address, folder, version and database. Log in opens the site's dashboard. Manage opens the site's manage page.
- To add a site, fill in Install WordPress: Website, Folder (optional), Site title, Administrator name, Administrator email and Password (optional). If you leave the password empty, one is generated and shown once.
- Click Install WordPress. The page follows the install step by step.
The page shows one account at a time. It does not list every install on the server in one table. WordPress updates itself from its own dashboard, so this list helps you spot old versions.
Customers get the same page under their own panel. See WordPress for customers.
Node.js
Software › Node.js has two tabs.
Applications lists every Node.js application on the server. Customers create these from their own Websites page. For each one you see:
- Wanted: what the customer asked for.
- Running: what systemd reports right now.
If they disagree, something is wrong. Use Manage on a row to Start, Restart or Stop the application, or to open The account. A not installed badge means the application is pinned to a Node version that is gone.
Runtimes is where you install Node itself. There is one card per major version.
- Click Install Node N. It is downloaded from nodejs.org and checked against the published checksum.
- To upgrade, click Update to the newest N.x. Applications keep running the old build until they restart.
- Remove Node N only appears when no application uses that version.
- Under The default runtime, pick a version and click Use this for new applications. Existing applications are not moved.
If the host has no systemd-run, a warning appears and installs are disabled. A card may also show Plans that cannot host a Node application. Fix those under Accounts › Packages. See Plans and performance.
Python
Software › Python also has two tabs.
Interpreters lists the available versions. Python comes from AlmaLinux's own packages, so it gets security updates with the system.
- Install adds a version. Several can coexist.
- Make default sets the version new applications start on.
- Remove… asks first. The panel refuses if an application still uses that version.
- The system's own Python has no Remove button, because
dnfruns on it.
Applications lists every Python application with its version, kind, Wanted and Running. You can Start, Restart and Stop them. A not installed badge means the interpreter is gone. not built means the application's environment was never built. Each application listens on a socket inside its own account, so there is no port to see here.
Containers
Software › Containers lets customers run applications from container images with rootless Podman. Each runs as its own account, inside that account's limits.
- Click Install at the top right. The page follows the install. It adds Podman from AlmaLinux's own repository.
- Under Plans with containers, switch containers on for the plans that should have them, in Accounts › Packages. The page links to each plan that has it.
- The Applications table lists every customer application with its state, and Start, Stop and Restart buttons. It also has Backups and update controls for each application.
Registries allowed shows which image registries customers may pull from. You narrow it in /etc/bhpanel/containers.json, for example {"registries": ["docker.io"]}.
An application marked separate disk moves into its account's own disk by itself. Move now does it at once.
Addons
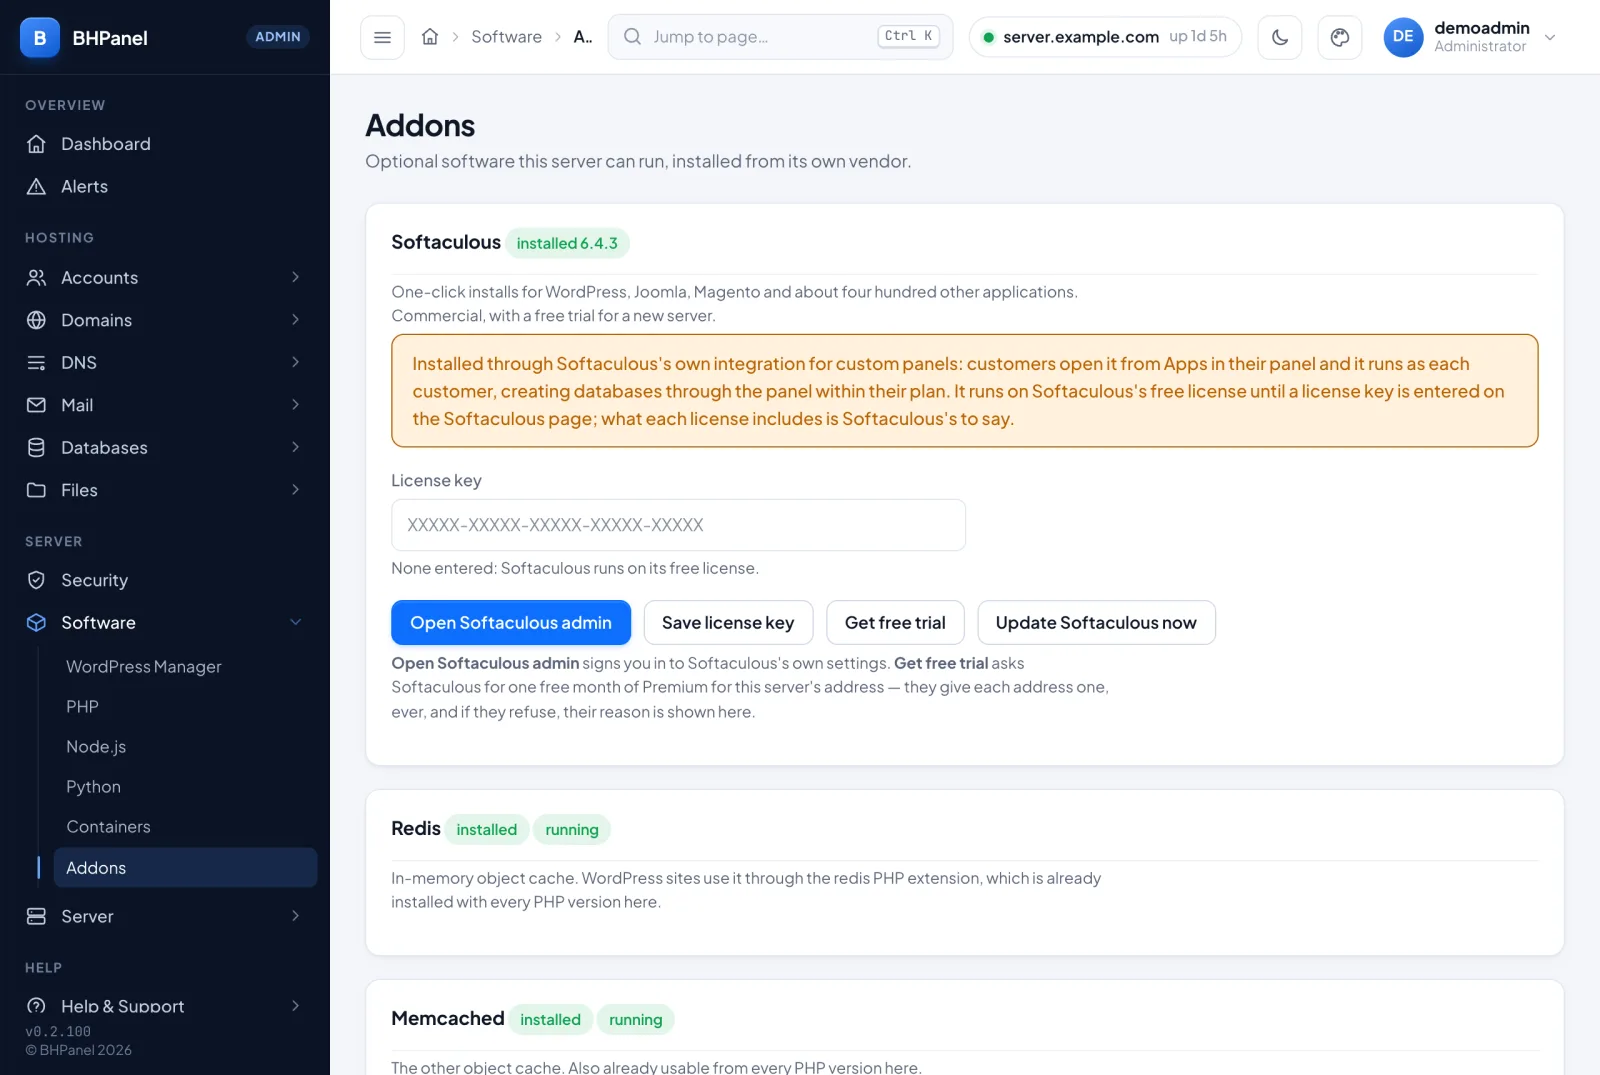
Software › Addons lists optional software the panel knows how to install and check. Click Install on a card and the install runs in the background. Reload the page to see progress.
| Addon | What it is |
|---|---|
| Softaculous | One-click installs for WordPress, Joomla, Magento and hundreds more. |
| Redis | In-memory object cache for WordPress. |
| Memcached | The other object cache. |
| PostgreSQL | A second database server beside MySQL. Its databases count in the same plan limit as MySQL ones. |
| MongoDB | A document database. It uses a licence (SSPL) you should read before offering it. |
| Adminer | A database browser for PostgreSQL. It needs PostgreSQL first. |
| ImageMagick | Image processing for better WordPress thumbnails. |
The list is short on purpose. There is no "install any package" box. Anything else belongs on the command line.
Softaculous
Once installed, the Softaculous card has four buttons.
- Save license key: paste your key into License key and click it. Leave the field empty and save to go back to the free license. Softaculous runs on its free license until you enter a key. What each license includes is Softaculous's to say.
- Get free trial: asks Softaculous for one free month of Premium for this server's address. Each address gets one, ever. If they refuse, their reason is shown on the page.
- Open Softaculous admin: signs you in to Softaculous's own settings, in a new tab.
- Update Softaculous now: updates it in the background.
If PHP is not set up the way Softaculous needs, a red message at the top of the card says what is wrong.
Softaculous admin will not save its settings
If Settings › General in Softaculous admin answers "No cron job time was specified" or "No update preference was submitted", two of its settings are empty. Servers installed before 0.2.107 left them empty; from 0.2.107 the panel fills them itself, at install and whenever you save the license key, and never changes a value you chose.
To fix it by hand, open Open Softaculous admin › Settings › General, set these, and click Edit Settings:
| Setting | Value |
|---|---|
| Cron job time | 17 4 * * * (every day at 04:17, when the panel's own Softaculous update runs) |
| Update preference (Softaculous itself) | Stable |
| Auto-update scripts | Off |
| Auto-add new scripts | Off |
Keep the two script switches off: with them on, Softaculous downloads every application package it does not have, which can fill the disk.
Customers open Softaculous from their own panel. It runs as each customer, and the databases it creates count against their plan. See WordPress for customers.