Securing your server
BHPanel comes with a firewall, a web application firewall, Malware Watch and scanners — but some of them start switched off, because only you can decide when your sites are ready for them. This page is the order to do it in, and what to leave alone. For every tool explained one by one, see The Security Center, tab by tab.
The first hour
- Two-factor sign-in for the administrator: the menu under your name › Edit profile › Two-factor (also listed on Server › Essential setup). Keep the recovery codes off the server. Then add a passkey on the next tab, so you can sign in with your fingerprint, face or device PIN.
- Arm the firewall: Security › Firewall › Arm the firewall. Until then the firewall is in testing mode and blocks nothing for long. Arming is refused if SSH or the panel's port would be shut.
- SSH: Security › SSH access. Add an SSH key for root, check in a new terminal that you can sign in with it, then untick Allow password authentication. Leave Allow root to log in on: with passwords off, root can only sign in with its key. Step by step: SSH access.
- Threat feeds: Security › Firewall › Switch on the recommended feeds (Spamhaus DROP and Emerging Threats). They block known-bad networks before they reach anything.
- Malware Watch: Security › Web & malware › Malware Watch › Switch on.
- Updates: Server › Update — operating-system updates (security only, or everything), automatic reboots for a new kernel in a quiet hour (default 04:00), and the panel's own update channel.
The web firewall (ModSecurity)
Security › Web & malware › Web firewall runs the OWASP Core Rule Set. It starts in Detecting only: every rule runs and is logged, nothing is refused.
- Leave it detecting for a few days while your sites are used normally.
- Read Security › Activity. BHPanel already lets through the everyday requests of WordPress, WooCommerce, Elementor, CartFlows, Rank Math and other popular plugins.
- When the log is clean, Start blocking. Matching requests then get a 403.
If one site keeps being refused, prefer Turn off one rule (by its id from the activity log) over Exclude a site, which switches the firewall off for that whole site.
Once blocking, an address the web firewall keeps refusing — 5 times in an hour — is shut out of the whole server for an hour, and for good after 4 such blocks in a day. Cloudflare's addresses are never blocked.
Signing in: two-factor and passkeys
Every login — administrator, reseller and customer — has its own Edit profile page (the menu under your name), with tabs for the photo, email address, password, Two-factor and Passkeys.
Two-factor sign-in. After the password, sign-in asks for a six-digit code from an authenticator app on your phone.
- Edit profile › Two-factor: scan the code with the app, type your current password and the six digits, press Turn on.
- Save the ten recovery codes somewhere other than that phone. Each works once, in place of a code from the app.
- Turning it on signs the login out everywhere else; the browser you used stays signed in.
A customer who lost both the phone and the codes: open the account (Accounts, or for a reseller Customers) and press Turn off two-factor. The customer is emailed that it happened; if the email cannot be sent, the panel says so — tell them yourself.
Passkeys. A passkey signs in with a fingerprint, face or the device's PIN instead of the password, and counts as two-factor on its own. It cannot be phished or guessed.
- Edit profile › Passkeys: confirm your password — and your two-factor code, if you have two-factor on. That unlocks adding passkeys for ten minutes.
- Name the device and press Add a passkey, then follow your browser.
- Next time, press Sign in with a passkey on the sign-in page.
Passkeys work only on the panel's own name (for example
https://server.example.com:2087) with a valid certificate — browsers refuse
them on an IP address. The password sign-in always stays available. Each
passkey you add is emailed to the login's address.
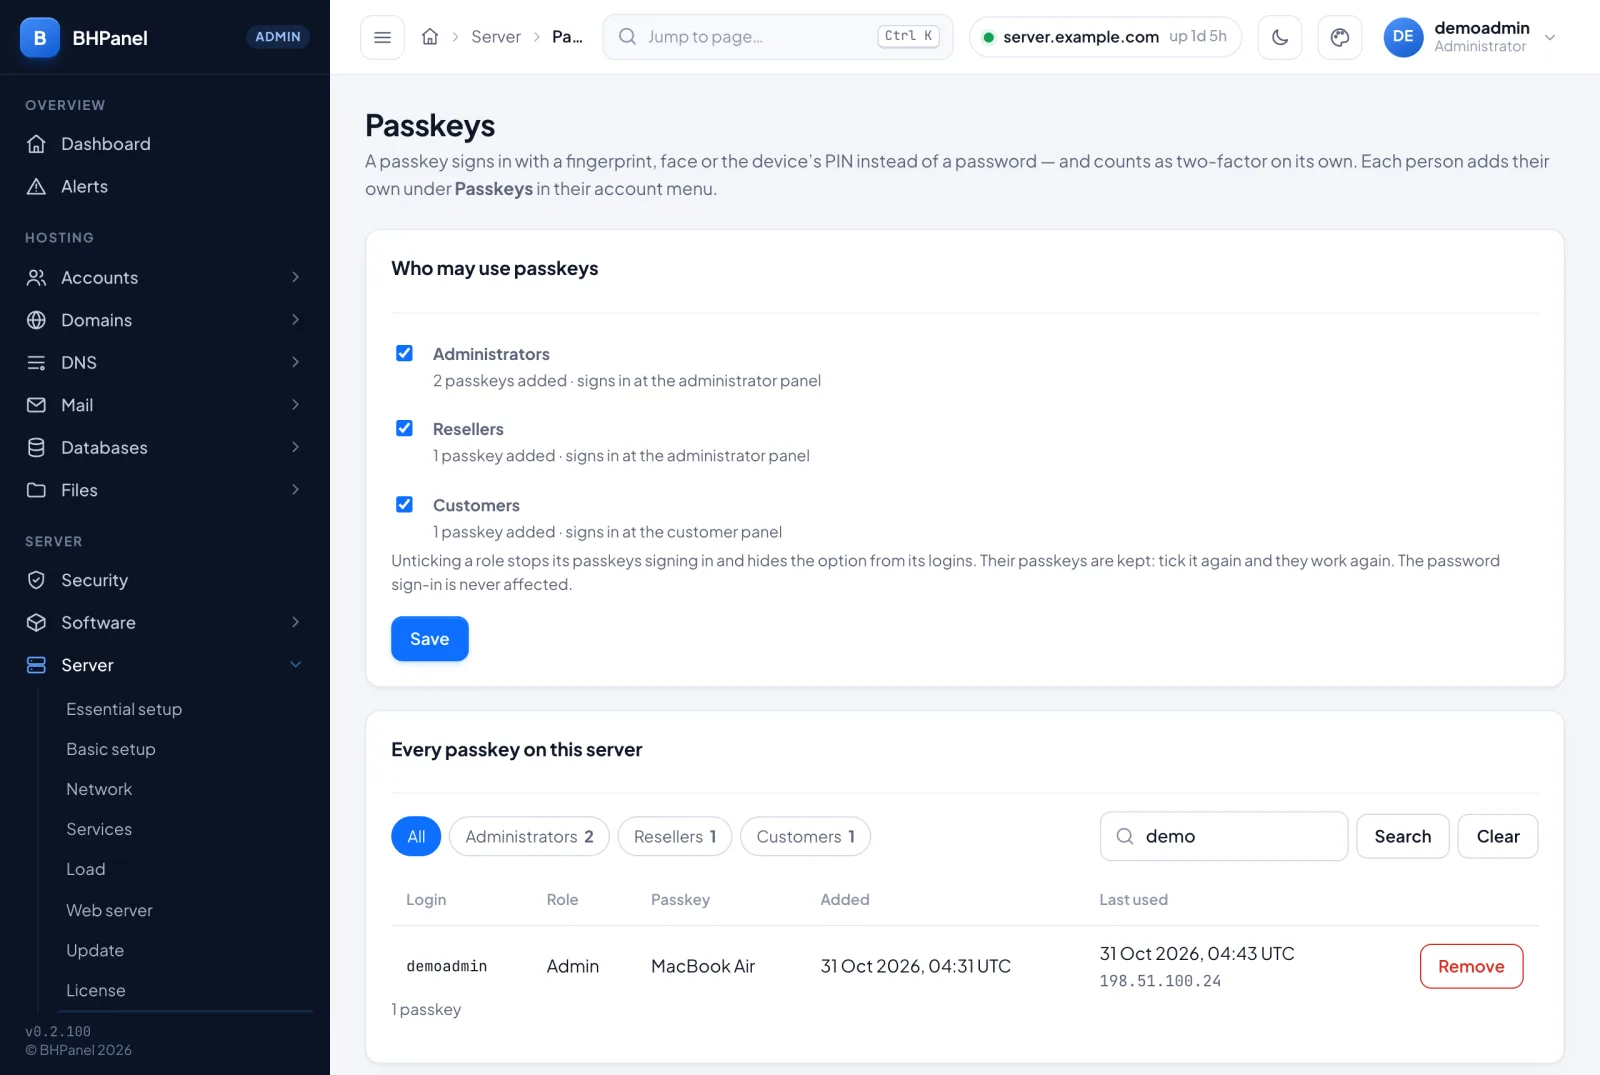
Server › Passkeys (administrator) switches passkeys on or off for administrators, resellers and customers separately — passkeys of a role switched off are kept, and work again when it is switched back on — and lists every passkey on the server, so one from a lost device can be removed.
Lost everything — the phone, the codes, the passkeys, the password? With root (or sudo) on the server, one command gets any login back: see Locked out? Get back in from SSH.
Log in as and billing-system sign-in links (WHMCS, Blesta, FOSSBilling) never ask for a two-factor code or a passkey. They cannot add a passkey or change two-factor either: that is the login owner's, signed in as themself.
Logins
Repeated failed logins to SSH, FTP or mail (SMTP, IMAP, POP3) get the address blocked for an hour, and for good after 4 blocks in a day — see Security › Attack protection › Login protection, which shows how many are blocked right now. Add your own office under Firewall › Countries and networks › Never blocked automatically so a mistyped password never locks you out.
Countries and networks
Security › Firewall › Countries and networks blocks whole countries or
networks (AS15169) — useful when a site only sells in a few countries.
Allowed past the firewall is dangerous: it lets that country through on every port, past every rule. Use Allow an address for a single trusted address instead.
Malware Watch
Malware Watch checks every script file the moment it is written:
- a file it is sure about is refused at upload (file manager, archive extraction, visitors' uploads on Nginx + Apache) or moved to quarantine;
- a doubtful one is only reported, for you to look at.
Quarantined files are kept in /home/.bhpanel-quarantine (root only) and can be
put back. Safe on every account marks a file's exact content as safe
everywhere; Mark as malware on every account does the opposite. PHP never
runs from a WordPress uploads folder in the first place.
Security › Web & malware › Malware scans adds rootkit, hardening and virus scans on a schedule; they only report, they never change anything.
Selling shared or reseller hosting
If customers you do not know can sign in over SSH or the panel's terminal, run the Account isolation check. It confirms that the walls between accounts are still standing: every site confined to its own home, every PHP pool naming only its own account, and no home readable by the account next door.
- Open Security › Web & malware › Malware scans › Account isolation.
- Switch it On, and keep Look for setuid files on — a setuid root file in a customer's home turns a web shell into a root shell.
- Set Run automatically to Every day and press Save. Switching it on alone does not schedule it: with Never it only runs when you press Run it now.
- Press Run it now once, and read what it finds.
Turn on Look for world-writable directories now and then rather than nightly: it is slower, and much software creates such folders on purpose.
Only tick SSH access on the plans whose customers need it (Accounts › Packages). A customer's shell is always confined to their own account, but an account without one is a smaller target.
Do
- Keep one remote backup destination — see Backups.
- Give customers SSH access only on plans that need it.
- Give API tokens an allowed address and an expiry (Accounts › API access).
- Read the dashboard alerts; they are written to say what to do.
- Keep plans' CPU, memory and processes set — never
0.
Don't
- Don't edit configuration files the panel writes — the web servers, PHP pools, mail maps, phpMyAdmin, Roundcube. They are marked Managed by bhpaneld and are rewritten; change things through the panel.
- Don't leave the firewall in testing mode, and don't switch on csf's own automatic updates, SYNFLOOD or MESSENGER — the panel keeps them off for a reason, shown on Firewall › Settings.
- Don't leave SSH password authentication on — use an SSH key for root — and don't turn passwords off before that key works.
- Don't run the web firewall in blocking mode before the log is clean, and don't exclude a whole site for one rule.
- Don't add block lists to csf by hand: use the panel's threat feeds, which never block your own addresses.
- Don't give the administrator's login to anyone: make them a reseller, or a collaborator on one account.
The panel itself
Administrators and resellers sign in on port 2087, customers on 2083; a
login only works on its own side, with a password, a password and a two-factor
code, or a passkey. The administrator's terminal runs as a named
user who must use sudo, never as root, needs two-factor sign-in and switches
itself off after four hours. Customers' terminals are jailed in their own
account.