Use Email to create mailboxes for your domains, forward mail, set up auto-replies, open webmail and connect a mail app. The menu has two pages: Email › Mailboxes and Email › Email routing.
Your mail domains
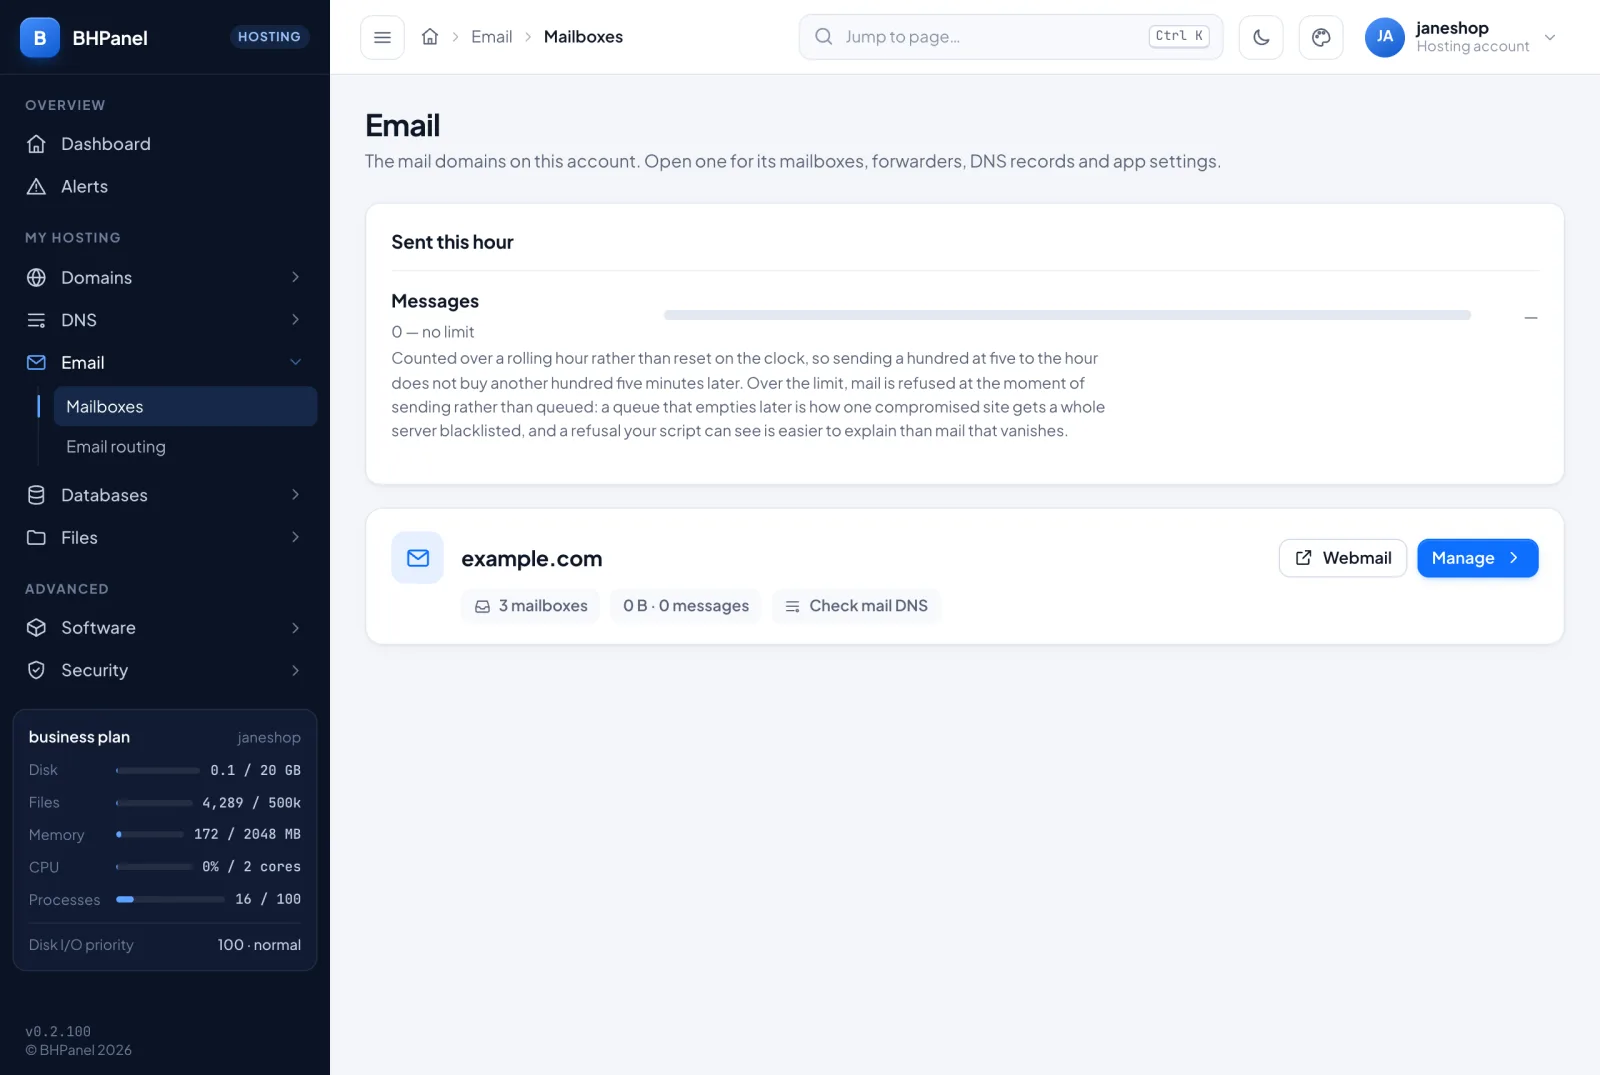
Open Email › Mailboxes. You see one card for each domain that has mail turned on. Each card shows how many mailboxes the domain has, the space they use and how many messages they hold. It also shows:
- Webmail, which opens webmail for that domain.
- Manage, which opens the domain's own page.
- Check mail DNS, which opens the Mail DNS tab.
If a domain is missing from the list, mail is not turned on for it. Ask your hosting provider to enable it.
Inside a domain there are four tabs: Mailboxes, Forwarders, Mail DNS and Mail apps.
Create a mailbox
- Open Email › Mailboxes and click Manage on the domain.
- On the Mailboxes tab, click Add a mailbox.
- In Address, type the part before the @, for example
sales. - Type a Password.
- In Space, type a size in MB.
0means no limit. - Click Create.
The mailbox counts towards your disk space. Your plan may limit how many mailboxes you can have. The tab shows this as "2 of 10". When you reach the limit, the Add a mailbox button is replaced by a note.
Change a password or size, block sign-in, or delete
In the mailboxes table, click Manage on a row.
- Password: type a new password and click Set.
- Space: change the number of MB and click Set.
- Block sign-in: nobody can sign in, but mail still arrives and is kept. Click Allow sign-in again to put the same password back.
- Delete: removes the address. Mail sent to it afterwards bounces. Tick also delete the ... of mail in it if you want the stored mail removed too. Type the full address in the box to confirm, then click Delete.
To stop someone using a mailbox without losing mail, block sign-in instead of deleting.
Webmail
Click Webmail on a mailbox row. A page called Opening webmail asks you to click Continue to webmail. This signs you in to that mailbox without typing its password. The link works once and only for about a minute. If you wait too long, go back and click Webmail again. Opening webmail again later ends the earlier webmail session for that mailbox.
You can also open https://webmail.example.com/ (use your own domain) and sign in with the full address and password. This is what the Webmail button on a domain card opens. A mailbox with sign-in blocked can only use this link.
Forwarders
A forwarder sends mail for one address straight on to other addresses. It keeps no copy, so it uses no space and has no password.
- Open the domain and click the Forwarders tab.
- Click Add a forwarder.
- In From, type the part before the @.
- In To, type one address, or several separated by commas. They can be at any domain.
- Click Add.
To stop a forwarder, click Remove next to it.
Catch-all
By default, mail to an address that does not exist is refused, and the sender is told. This is the safe setting.
Under Mail to addresses that do not exist on the Forwarders tab you can choose a mailbox in Send them to and click Turn on the catch-all. All mail for unknown addresses then goes to that mailbox. Expect a lot of spam, because every guessed and misspelled address arrives. Click Refuse them again to turn it off.
Auto-replies and filters
In the mailboxes table, each mailbox has an Autoresponder link and a Filters link.
Autoresponder
- Click the link in the Autoresponder column.
- Tick Send automatic replies.
- Optionally set From and Until dates. Leave From empty to start now. Leave Until empty to reply until you turn it off.
- Fill in Subject and Message.
- Choose how often to reply to the same sender (1, 3, 7 or 14 days).
- Click Save.
It never replies to mailing lists, bulk mail, automated senders such as "no-reply", mail marked as spam, or mail that one of the mailbox's filters deletes.
Filters
Filters sort mail as it arrives. They run from the top down, and the first one that matches decides. Click New rule and choose:
- If: From, To, Subject or Another header...
- Match: contains, is, or does not contain, with the Text to look for
- Then: move to folder, forward a copy to, delete, or mark as read
Use the arrows to change the order, Edit to change a rule and Delete to remove it. The page shows how many rules you have used out of the maximum. Spam goes to Junk before your rules run, and your rules never see it.
Settings for a mail app
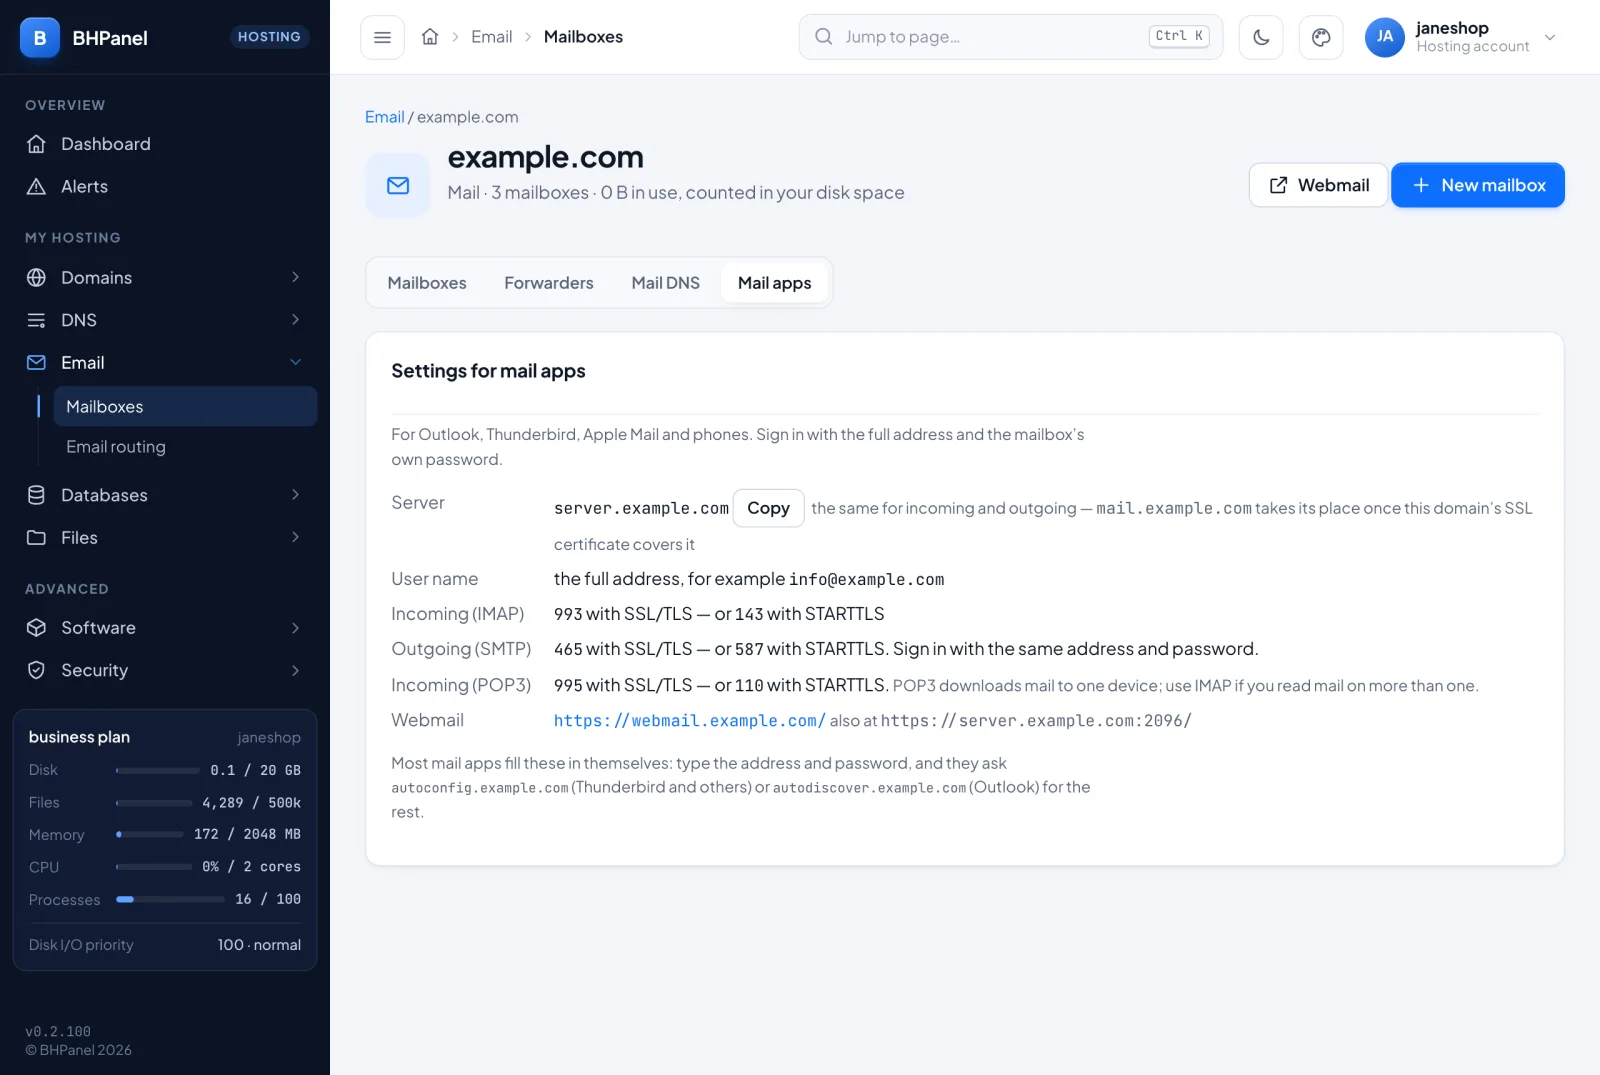
Open the domain, then the Mail apps tab. It shows the settings for Outlook, Thunderbird, Apple Mail and phones. Use the full address as the user name, and the mailbox's own password.
| Setting | Value |
|---|---|
| Server (incoming and outgoing) | mail.example.com |
| Incoming, IMAP | port 993 with SSL/TLS, or 143 with STARTTLS |
| Outgoing, SMTP | port 465 with SSL/TLS, or 587 with STARTTLS |
| Incoming, POP3 | port 995 with SSL/TLS, or 110 with STARTTLS |
mail.example.com is only an example. Read your real server name on the Mail apps tab and click Copy next to it. If the tab says not set up yet, the server has no mail name yet. Ask your hosting provider, and use webmail in the meantime.
Use IMAP if you read mail on more than one device. POP3 downloads mail to a single device.
Most mail apps can fill these in for you. Type the address and password, and the app asks autoconfig.example.com (Thunderbird and others) or autodiscover.example.com (Outlook) for the rest.
Mail DNS
Open the domain and click the Mail DNS tab. It lists the records your domain should publish so mail arrives and is not filed as spam: MX, SPF, DKIM and DMARC. For each one you see the name, the value (with a Copy button) and the state:
- In place
- Needs a look
- Missing or wrong
- Waiting for receivers
The page also shows where mail leaves from, the name it introduces itself as, and whether the domain's DNS is answered by your hosting provider or by another company. If it is another company, a record changed in the panel is not seen by anyone. Add the records at that company. Click Check again after a change. Public resolvers can keep an old answer for a while, so a change may take time to show.
If the DKIM row says Not set up, ask your hosting provider to turn DKIM on for the domain. The reverse DNS of the sending address is set by whoever provides the address, not in your DNS.
Email routing
Open Email › Email routing. For each domain, it shows where its mail is delivered: Here (the mailboxes in this panel) or Elsewhere (the server named by the domain's MX record). Choose a setting and click Change:
- Automatic (the default): mail is delivered here while the MX record points to this server. Otherwise it goes to the server the MX names. The check runs every 30 minutes, or click Check now.
- Local: always delivered to the mailboxes here. It is offered only when the MX points here.
- Remote: always delivered to the server the MX names, even mail sent from websites on this server.
Choose Remote when your mail is at Google Workspace, Microsoft 365 or another host. Mail from your websites then reaches those mailboxes too, instead of looking for a local mailbox.
If you are moving a domain here, create the mailboxes first and move your mail in. Then point the DNS here. Automatic starts delivering here by itself. Until then, the domain's page shows a warning that new mail is not delivered here yet. The mailboxes still work for webmail, mail apps and sending.
Sending limit
The top of Email › Mailboxes shows Sent this hour: how many messages you have sent out of your limit. The count covers a rolling hour. Over the limit, mail is refused at the moment of sending rather than queued. The page shows "no limit" if your plan has none.